Categories
Apps

What Is Background App Refresh on iPhone & Android?

What is background app refresh? Smartphones are designed to make our lives easier. They keep us connected to the internet, our email, and our social media accounts.

But they can also be a drain on our battery life and data usage. One way to help conserve your battery life and data usage is to disable background app refresh on your iPhone or Android device.

Background app refresh allows apps to check for new content in the background. This can be useful if you have an app that needs to update its content regularly, such as a news app.

But it can also use up battery life and data unnecessarily. If you don’t need an app to update its content in the background, you can save battery life and data by disabling background app refresh.

To disable background app refresh on an iPhone, go to Settings > General > Background App Refresh and toggle the switch for each app off.

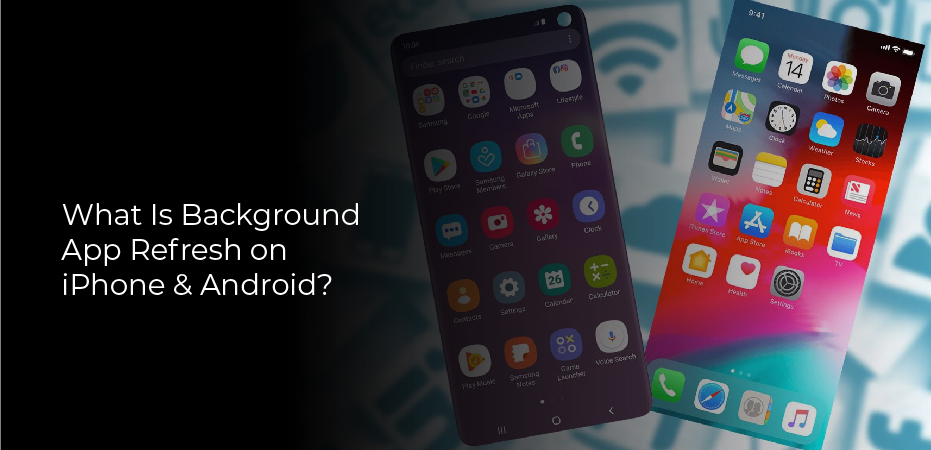
What Is Background App Refresh?

Background app refresh is a feature on your iPhone that allows apps to update their content in the background. This means that when you open the app, it will have the latest information.

You can turn off background app refresh by going to Settings > General > Background App Refresh. Here, you can see which apps are refreshing in the background and toggle the feature off for those apps.

Background app refresh is a great way to keep your apps up-to-date, but it can also lead to battery drainage. If you’re worried about your battery life, you can always turn off the feature for certain apps or altogether.

What Does Background App Refresh Do?

With the release of iOS 7, Apple introduced a new feature called Background App Refresh. This allows apps to “refresh” their content in the background, meaning that they can update their content even when you’re not using them.

So what does this mean for you? Well, if you have an app that relies on data from the internet (like a news app), then Background App Refresh can be a godsend. It means that your app will always have the latest information, without you having to do anything.

Of course, there are some downsides to Background App Refresh. The main one is that it can use up battery life, as your apps are constantly checking for new data. So if you’re worried about your battery life, it’s best to turn off Background App Refresh for any apps that don’t absolutely need it.

Should I Use Background App Refresh?

Most of us have phones with us at all times. We rely on them for communication, entertainment, and to stay connected to the world around us. So it’s no surprise that we want our apps to be up-to-date and running smoothly.

Background App Refresh is a feature that allows apps to update in the background while you are using your phone. This can be helpful if you want your apps to be up-to-date without having to manually refresh them. However, Background App Refresh can also use up battery life and data.

So should you use Background App Refresh? It depends on your needs and preferences. If you value having up-to-date apps, then it may be worth the trade-off of slightly reduced battery life.

How to Turn Off Background App Refresh on iPhone

How to Turn Off Background App Refresh on iPhone: Open the Settings app. Tap General. Tap Background App Refresh. Toggle the switch next to Background App Refresh to the Off position.

Turning off background app refresh can help conserve battery life on your iPhone. When background app refresh is turned on, apps that take advantage of this feature can check for new content in the background and update their content so that it’s ready for you to view when you open the app.

However, this constant checking and updating can use up battery power, so if you want to conserve battery life on your iPhone, it’s best to turn off background app refresh.

To turn off background app refresh, simply open the Settings app and tap General. Then tap Background App Refresh and toggle the switch next to Background App Refresh to the Off position.

How to Turn Off Background App Refresh on Android

Most people keep their smartphones with them at all times, which means that apps can take up a lot of battery life in the background. One way to help conserve your battery is to turn off background app refresh for apps that you don’t use often. Here’s how to do it:

Open the Settings app on your Android device and tap “Battery.” Tap the menu button in the top-right corner and select “Battery Optimization.”

Find the app you want to disable background refreshing for and tap it, then select “Don’t optimize” from the drop-down menu. You can also select “Never allow” if you never want that app to refresh in the background.

Categories
Windows

Microsoft Exchange Server: Features, Requirements & Clients

Microsoft Exchange Server is a mail server & calendaring server developed by Microsoft. It works exclusively on Windows Server operating systems.

Microsoft Exchange Server was first released in 1996. It has since undergone several major releases, the latest being Exchange Server 2016, which was released in October 2015.

Exchange Server is a core component of Microsoft’s email and collaboration offering, which also includes Outlook, SharePoint, and Skype for Business.

How does Exchange Server work?

Microsoft Exchange Server is a software that enables users to exchange emails, calendars, and contacts with each other. It also allows users to share files and schedule meetings. Exchange Server uses the Microsoft Outlook client to connect to the server.

When a user sends an email, it is first routed to the Microsoft Exchange Server. The server then looks up the recipient’s address and forwards the email to their mail server. The recipient’s mail server then delivers the email to the recipient’s inbox.

Exchange Server can also be used to synchronize calendars between users. When a user creates or edits an event in their calendar, the changes are automatically synced with the Exchange Server and propagated to all other connected users.

Exchange Server 2019 features

Microsoft Exchange Server 2019 is the latest release of Microsoft’s on-premises email server. Here are some of the new features and improvements in this release:

1. support for larger mailboxes – up to 100 GB per user;
2. more flexible deployment options, including the ability to deploy on Windows Server Core for the first time;
3. improved performance and scalability, with up to 30% better performance than Exchange Server 2016;
4. new compliance and security features, including data loss prevention (DLP) policies and encryption at rest;
5. a redesigned web interface – the new Exchange Admin Center (EAC) makes it easier to manage your Exchange environment;
6. integration with Office 365 – you can now move mailboxes from on-premises Exchange to Office 365, or vice versa.

Exchange Server 2019 requirements

To install Microsoft Exchange Server 2019, your computer must have the following:
• Operating system: Windows Server 2019 Standard &Datacenter.
• Processor: Intel Xeon E5 v4 or later/AMD Opteron 63xx or later.
• Memory: 8 GB RAM minimum, 16 GB recommended.
• Hard disk space: 150 GB minimum for the combined Mailbox and Transport roles, 500 GB recommended for the Mailbox role only. If you intend to keep a copy of your Exchange databases and transaction logs on a local drive, you’ll need additional space for those as well.
• Display resolution: 1024 x 768 pixels & higher.

Exchange Server high availability

When it comes to email servers, Microsoft Exchange Server is one of the most popular options out there. And for good reason – it’s reliable, feature-rich, and easy to use. But what about when you need even more reliability? That’s where Microsoft Exchange Server high availability comes in.

Exchange Server high availability is a set of features that helps keep your email server up and running, even in the face of hardware or software failures. It’s designed to give you peace of mind knowing that your email server is always available, no matter what happens.

If you’re looking for a reliable email server solution, Exchange Server 2019 high availability is definitely worth considering. It can help keep your business running smoothly, even when things go wrong.

Exchange Preferred Architecture

The Microsoft Exchange Server Preferred Architecture is a set of guidelines and best practices for designing and deploying an Exchange Server environment. It is based on the experience of Microsoft engineers who have deployed Exchange Server in a variety of customer environments.

The Preferred Architecture provides guidance on server roles, network design, storage design, and other factors that can impact the performance and stability of an Exchange Server deployment. It is intended to be used as a starting point for designing an Exchange Server environment that meets the specific needs of an organization.

Microsoft provides detailed documentation for the Preferred Architecture on the TechNet website. This article provides a summary of the key components of the Preferred Architecture and links to additional resources.

Exchange Server clients

There are many Microsoft Exchange Server clients that can be used to connect to an Exchange server. Some of the most popular clients include Microsoft Outlook, Exchange Web Services, and ActiveSync.

Microsoft Outlook is the most widely used client for connecting to an Exchange server. It is a desktop application that can be used to send and receive email, calendar appointments, and tasks.

Exchange Web Services is a web-based client that can be used to access email, calendar, and contacts from an Exchange server. It can be accessed from any web browser.

ActiveSync is a mobile client that can be used to sync email, calendar, and contacts with an Exchange server. It is available for iPhone, Android, Windows Phone, and BlackBerry devices.

Pros and cons of Exchange Server

Microsoft Exchange Server is a popular choice for businesses when it comes to email servers. However, there are both pros and cons to using Microsoft Exchange Server that businesses should be aware of before making a decision.

On the plus side, Microsoft Exchange Server is a very reliable email server with a lot of features that businesses can take advantage of. It’s also easy to set up and use, which can save businesses time and money.

On the downside, however, Microsoft Exchange Server can be expensive to purchase and maintain. Additionally, it’s not always compatible with all types of email clients, which can be a problem for businesses that use non-standard email client software.

Categories
Software Technology

The Best Free Antivirus Software for 2022

There are many reasons to use free antivirus software. Perhaps the most important reason is that it can protect your computer from malware, viruses, and other threats.

It can also help defend against phishing attacks and other online threats. Free antivirus software can be a great way to keep your computer safe, especially if you don’t have the budget for a paid subscription.

Another great reason to use free antivirus software is that it’s usually updated more frequently than paid versions. This means that you’ll always have the latest protection against new threats.

Additionally, free antivirus software often comes with more features than its paid counterparts. For example, some free antivirus programs include extra tools like privacy protection and parental controls.

If you’re looking for free antivirus software, there are plenty of great options to choose from.

Best for Comprehensive Free Security

There are a few great free antivirus software programs out there that can give you comprehensive security without breaking the bank. We’ve rounded up the best of the best so you can choose the one that’s right for you.

Avira Free Antivirus is a great option for those looking for comprehensive protection. It offers real-time protection against malware, adware, and spyware. It also has a Heuristic engine that can detect new and unknown threats.

AVG AntiVirus FREE is another excellent choice for free antivirus protection. It offers real-time protection against viruses, malware, and spyware. It also has a built-in firewall to help protect your computer from external threats.

Microsoft Security Essentials is another solid option for free antivirus protection.

Best for Few-Frills Protection

Assuming you want a list of the best free antivirus software for basic protection:

1. Avira Free Antivirus
2. Panda Free Antivirus
3. AVG AntiVirus FREE
4. Avast Free Antivirus
5. Sophos Home Free
6. Bitdefender Antivirus Free Edition
7. Ad-Aware Free Antivirus+

Best for No-Frills Protection

There are many antivirus software programs on the market. Some of them are free & some of them you have to pay for. So, which one should you choose?

If you’re looking for the best free antivirus software that will give you basic protection without a lot of bells and whistles, then we’ve got some options for you.

Here are three of the best free antivirus programs that will provide adequate protection against most threats:

Avira Free Antivirus: This program offers real-time protection against all types of malware, including viruses, Trojans, worms, and spyware. It also features email protection and can scan your system for vulnerabilities.

AVG AntiVirus Free: This program provides basic protection against viruses, spyware, and other malicious software.

Best for Many Security Components

There are many antivirus software programs on the market, but not all of them are free. Here is a list of the best free antivirus software for many security components.

Avast Free Antivirus: This program provides real-time protection against malware and phishing attacks. It also includes a firewall to protect your computer from network-based threats.

AVG AntiVirus Free: This program offers basic protection against viruses, spyware, and other malware. It also includes a link scanner to check for dangerous links in emails and on websites.

Bitdefender Antivirus Free Edition: This program provides advanced protection against viruses, spyware, rootkits, and other malware.

Best for Windows Die-Hards

For die-hard Windows users, there is no shortage of antivirus software to choose from. However, not all antivirus software is made equal. Some are more effective than others, and some are more expensive. But what if you don’t want to spend a lot of money on antivirus software?

Luckily, there are a few great free antivirus programs for Windows users. Here are the best free antivirus programs for Windows die-hards:

Microsoft Security Essentials: This program is developed by Microsoft and provides real-time protection against malware. It is lightweight and easy to use, making it a great option for die-hard Windows users.

Avast Free Antivirus: This program provides excellent protection against malware, including viruses, spyware, and adware.

Free Antivirus vs. Paid Antivirus

In the world of antivirus protection, there are two main types: free and paid. Both have their pros & cons, but which one is right for you?

If you’re on a tight budget, free antivirus protection may be the way to go. However, keep in mind that free options typically don’t offer as much comprehensive protection as paid versions.

Paid antivirus software generally provides more features and better protection against malware and viruses. However, it can be more expensive than free options.

So, which should you choose? It really depends on your specific needs and budget. If you’re looking for comprehensive protection, a paid option may be worth the investment. However, if you’re on a tight budget, a free option may be sufficient.


Categories
How to

How to Delete a Reddit Account? A Complete Guide

How to delete a reddit account? Reddit is a social news website where users can submit content in the form of a link or text post. Other users can then vote on the submissions, and the most popular submissions will be displayed on the front page of the website.

Reddit has been stated as “the front page of the internet”.Users can create their own subreddit, which is a sub-forum dedicated to a specific topic.

For example, there are subreddits for news, gaming, movies, and many other topics. Reddit also has an upvote/downvote system, which allows users to signal whether they like or dislike a particular submission.

If you’re looking for something new to read or watch, chances are you’ll find it on Reddit. With millions of active users, there’s always something interesting happening on this social media platform.

Is Your Personal Info Removed When You Delete Your Account?

When you delete your Reddit account, your username, password, and email address are removed from our servers. However, the content you posted while your account was active may still be visible to others.

If you have questions about whether your personal information has been deleted, please contact us at [email protected].

Are Deactivation and Deletion the Same?

When a user deactivates their Reddit account, their username is no longer searchable and their profile is set to private. Their posts are still visible to others, but they cannot comment or vote. A deleted Reddit account cannot be recovered.

When a user deletes their Reddit account, their username is no longer searchable and their profile is removed. All of their comments and posts are also removed. A deleted Reddit account cannot be recovered.

So, are Reddit deactivation and deletion the same? No, they are not. Deactivation gives the user the option to reactivate their account at any time, while deletion is permanent.

Can You Reactivate Your Account Later?

If you’ve ever deactivated your Reddit account, you may be wondering if you can reactivate it later. The answer is yes! You can easily reactivate your account by logging back in with your username and password. However, there are a few things to keep remember before you do so.

First, all of your data will still be intact when you reactivate your account. This includes any messages, posts, or comments you made while your account was deactivated. However, some of your data may be missing if it was deleted by a moderator during the time your account was inactive.

Second, you will need to verify your email address again before you can log in. This is to ensure that only the rightful owner of the account can reactivate it.

How to Delete a Reddit Account

If you’re done with Reddit, it’s not hard to delete your account. Just follow these simple steps and you’ll be rid of your Reddit account for good.

First, log into your Reddit account and go to the Preferences page. Scroll down to the bottom and click on the “Deactivate Account” button. Enter your username and password again to confirm.

Once you’ve deactivated your account, it will be permanently deleted within 30 days. So if you change your mind, you have a month to log back in and reactivate it. Otherwise, it’s gone for good!

With a Reddit Premium Subscription

If you want to delete your Reddit account but have a Reddit premium subscription, there are a few extra steps you need to take. Here’s how to do it:

First, log into your account and go to the settings page. Scroll down to the bottom and click on the “Delete Account” button.

Enter your password and confirm that you want to delete your account. Keep in mind that this cannot be undone!

Once you’ve deleted your account, contact Reddit customer service and let them know that you’d like to cancel your premium subscription. They should be able to refund you for any unused time.

Deleting Your Posts and Comments

Are you looking to delete your Reddit posts or comments? Here’s a step-by-step guide on how to do it.

First, open up the Reddit post or comment that you want to delete. Second, click on the three dots in the top-right corner of the post or comment. A menu will pop up with the option to “delete.” Click on that, and then confirm that you want to delete the post or comment.

And that’s it! Once you’ve deleted your Reddit post or comment, it will be gone forever.

On Mobile Device

If you’re using a mobile device, such as an iPhone or iPad, and you want to delete your Reddit account, here’s how to do it.

First, open the Reddit app and tap on the three lines in the upper left-hand corner. This will open the menu. Next, scroll down and tap on Settings. Under Account Settings, tap on Delete Account.

Enter your username and password to confirm that you want to delete your account. Once you’ve done that, your account will be deleted and you’ll no longer be able to access it.

Categories
How to

How to Superscript in Google Docs?

How to superscript in google docs? Whether you’re a student or professional, at some point you’ll likely need to use superscript in Google Docs. While the process is fairly straightforward, there are a few things to keep in mind. In this article, we’ll show you how to use superscript in Google Docs, as well as cover a few tips and tricks.

If you’re looking to add superscript text in Google Docs, there are a few different ways you can do it.

One way is to use the built-in formatting options. To do this, simply highlight the text you want to format and then click on the “Format” menu at the top of the page. From there, select “Text” and then “Superscript.”

Another way to add superscript text is by using keyboard shortcuts. To do this, first make sure your cursor is placed where you want the superscript text to appear. Then, hold down the “Ctrl” key on your keyboard and press the “+” key (located next to the “Backspace” key). This will format your selected text as superscript.

Finally, you can also use HTML code to add superscript text in Google Docs.

Apply Superscript in Google Docs (Text, Numbers & Symbols)

If you want to add superscript text, numbers or symbols in Google Docs, there are a few different ways you can do it.

You can apply superscript formatting to text by selecting the Text Formatting drop-down menu from the top toolbar and selecting Superscript. This will automatically format your selection as superscript.

Alternatively, you can add superscript by using keyboard shortcuts. To format text as superscript, highlight the text you want to format and press Ctrl + . (Windows) or ⌘ + . (Mac). For example, if you wanted to write “H2O” with the 2 as a superscript, you would type “H2O” and then press Ctrl + .

Applying superscript using the Format menu

When you want to add superscript to text using the Format menu, there are a few steps you need to follow.

  • First, select the text that you want to turn into superscript.
  • Next, click on the Format menu and then select Font.
  • In the dialogue box that appears, go to the Effects tab and check the Superscript checkbox.
  • Finally, click on OK to apply your changes.
  • If you want to add superscript to just a portion of your text, you can use the shortcut key Ctrl+Shift+= (Ctrl+Shift+ plus sign).
  • With your text selected, simply press this key combination and your text will be turned into superscript.

Applying superscript using a keyboard shortcut

Applying superscript using a keyboard shortcut is a quick and easy way to add text formatting to your document. There are a few more ways to do this, depending on your operating system.

  • On Windows, you can select the text you want to format and press CTRL + SHIFT + + (press and hold the control key, shift key, and plus sign simultaneously).
  • This will format the selected text as superscript.
  • On Mac, you can select the text you want to format and press CMD + SHIFT + + (press and hold the command key, shift key, and plus sign simultaneously).
  • This will format the selected text as superscript.
  • Both Windows and Mac also allow you to highlight the text you want to format and press CTRL / CMD + 1 (one) to quickly format it as superscript.

Inserting specific characters in superscript

Inserting specific characters in superscript can be a challenge if you don’t know the Alt code for the character. If you need to insert a character that isn’t on your keyboard, such as the copyright symbol, you can use the Alt code.

The Alt code for the copyright symbol is 0169. To insert the copyright symbol, hold down the Alt key and type 0169 on your numeric keypad. You’ll see the copyright symbol appear in your document.

Using Subscript & Superscript In Google Docs

It’s easy to use subscript and superscript in Google Docs. Here’s how:

To use subscript in Google Docs, simply type the underscore character (_) before and after the text you want to make subscript. For example, if you wanted the word “subscript” to appear as a subscript, you would type it as: _subscript_.

To use superscript in Google Docs, simply type the caret character (^) before and after the text you want to make superscript. For example, if you wanted the word “superscript” to appear as a superscript, you would type it as: ^superscript^.

Categories
How to

How to Delete a Cash App Account? Step by Step Guide

How to delete a cash app account? If you’re one of the millions of people who have a Cash App account, you know how convenient it is to use. Whether you’re sending money to friends or family, or paying for goods and services, Cash App makes it easy.

But what happens if your Cash App account is suddenly blocked? This can be a frustrating experience, but there are a few things you can do to try and resolve the issue.

First, check to see if there’s an outstanding balance on your account. If so, you’ll need to pay that off before your account can be unblocked. Next, try contacting Cash App support to see if they can help resolve the issue.

If your Cash App account is still blocked after taking these steps, then it’s likely that there’s some other issue at play.

What Is Cash App?

Cash App is a mobile payment service developed by Square, Inc., allowing users to transfer money to one another using a mobile phone app.

Cash App also permits users to buy and sell bitcoin. As of February 2018, Cash App had 7M active users.

Cash App is similar to Venmo in that it allows for peer-to-peer payments, but it differs in that it also allows users to buy and sell bitcoin. Cash App also has a higher transaction limit than Venmo.

Cash out and remove all funds before you do anything else

If you’re one of the millions of people who use Cash App to send and receive money, you might not know that there’s a right way and a wrong way to use the app.

The wrong way? Leaving your money in Cash App.

You see, when you leave your money in Cash App, you’re not actually earning any interest on it. In fact, you could be losing money if the stock market goes down.

The right way to use Cash App is to cash out and remove all funds before you do anything else. That way, you can invest your money in a high-yield savings account or other investment vehicle and earn some real returns on it.

So if you’re using Cash App, make sure to cash out and remove all funds before doing anything else.

Steps to Delete a Cash App Account

Deleting a Cash App account is a process that can be completed in just a few steps. If you’re no longer using your Cash App account, or if you want to close it for any other reason, here’s how to do it:

1. Go to the Cash App on your iPhone or Android device.

2. Tap the profile icon in the top-left corner of the screen.

3. Scroll down and tap “Sign Out.”

4. Enter your password when prompted, then tap “Sign Out” again to confirm.

5. Once you’ve signed out of your account, tap “Delete Account.”

6. Read through the information about what will happen when you delete your account, then tap “Continue.”

Transfer Cash App Funds

Assuming you would like tips on how to transfer Cash App funds:

Cash App is a peer-to-peer payment application that allows users to send and receive money. Funds can be added to the app from a linked bank account or by using a credit or debit card. Users can also add funds to their Cash App balance by selling Bitcoin.

To transfer funds from Cash App to another person, simply enter the amount you wish to send, tap “Pay,” and select or enter the contact information for the person you’re sending money to.

You can also add a note to your payment. Once you’ve reviewed and confirmed the payment details, tap “Confirm.” Your recipient will then need to accept the payment in order for the transaction to be complete.

Delete Your Cash App Account

It’s easy to delete your Cash App account. If you no longer want to use Cash App, you can deactivate your account in just a few steps. Here’s how:

1. Open the Cash App on your iPhone or Android device.

2. Click the profile icon in the top-right corner of the screen.

3. Scroll down and tap “Delete Account.”

4. Enter your password and confirm that you want to delete your account.

Once you’ve deleted your account, all of your transactions and data will be erased from Cash App’s servers. You’ll no longer be able to access your account or view your transaction history.

Remove the Cash App From Your Phone

If you’re like many people, the Cash App is one of the first apps you install on your new phone. It’s a great way to send and receive money, but it’s also a major privacy risk. Here’s why you should remove the Cash App from your phone:

The Cash App collects a lot of data about its users. This includes your name, email address, phone number, and bank account information. All of this data is stored on servers that are vulnerable to hacking.

There have been several reports of people losing money after their Cash App account was hacked. In most cases, the hackers were able to access the victim’s bank account and withdraw money without their permission.

The Cash App also offers a feature called “Cash Boost.” This allows users to instantly get cash back when they make certain purchases.

Categories
Tech Guide

Gmail vs Hotmail: Fully Detailed Comparison

Gmail and Hotmail are two of the most popular email providers on the market. Both offer a variety of features and benefits, but which one is right for you? Here’s a look at Gmail vs Hotmail to help you decide.

Gmail has over 1 billion users and is the world’s largest email provider. It offers a variety of features, including 15GB of storage, security features, and an easy-to-use interface.

Hotmail has over 500 million users and is one of the oldest email providers. It offers a variety of features as well, including 10GB of storage, security features, and an easy-to-use interface.

So, which one should you choose? If you’re looking for the most popular option with a variety of features, Gmail is the way to go.

Gmail vs. Hotmail: Side-by-Side Comparison

Gmail vs. Hotmail Side-by-Side Comparison: Which One Comes Out on Top?

If you’re trying to decide between Gmail and Hotmail, this side-by-side comparison will help you make the best choice for your needs. Both email providers offer a variety of features, but they differ in some key areas.

Here’s a look at how Gmail and Hotmail stack up when it comes to important factors like security, storage, and user interface.

When it comes to security, Gmail is the clear winner. It offers two-factor authentication and encrypted connections, while Hotmail only provides the latter. Gmail also does a better job of filtering out spam messages.

Storage is another area where Gmail surpasses Hotmail. Each user gets 15 GB of free storage space with Gmail, while Hotmail only offers 5 GB.

Gmail vs. Hotmail: Must-Know Facts

When it comes to email providers, there are two that stand out above the rest: Gmail and Hotmail. Both have their pros & cons, but which one is right for you? Here are some must-know facts about Gmail and Hotmail so you can make the best decision for your needs.

Gmail has over 1 billion active users worldwide, while Hotmail has around 360 million. Gmail is a bit more user-friendly than Hotmail, with a cleaner interface and more features.

However, Hotmail does offer a few unique features, such as the ability to schedule emails and set up message rules.

Gmail is better at handling attachments than Hotmail, allowing you to preview attachments without having to download them first. Hotmail also offers 1 TB of storage space per account, while Gmail only offers 15 GB.

So which one should you choose?

History of Hotmail

Hotmail was one of the first web-mail services on the internet. It was founded in 1996 by Sabeer Bhatia and Jack Smith. Hotmail was acquired by Microsoft in 1997 for $400 million. The service was renamed to Outlook.com in 2013.

The service quickly grew in popularity, with over 8 million users within 18 months of its launch.

In 1997, Hotmail was acquired by Microsoft for $400 million. The service continued to grow under Microsoft, reaching over 100 million users by 2001. In 2013, the service was renamed to Outlook.com as part of a rebranding effort by Microsoft.

Hotmail Replaced with Outlook

Hotmail, the once-ubiquitous email service, has been officially replaced by Outlook. The change comes as part of Microsoft’s rebranding effort to unify its various web services under the Outlook name.

While Hotmail will still technically exist for the foreseeable future, Microsoft has begun redirecting users to the new Outlook.com interface. The company has also announced that Hotmail users will be able to keep their @hotmail.com email addresses, but it is encouraging them to switch to the @outlook.com address.

The move signals a shift in Microsoft’s strategy for its web services. Where Hotmail was once a standalone product, it is now being integrated into the broader Outlook ecosystem. This unification should make it easier for users to access their email, calendar, and contacts from any device or platform.

Gmail: Hotmail’s Biggest Competitor

Gmail and Hotmail are two of the most popular email providers in the world. While Hotmail has been around longer, Gmail has quickly become its biggest competitor. Here’s a look at why Gmail is giving Hotmail a run for its money:

Gmail offers more storage than Hotmail. While Hotmail offers 2 GB of storage, Gmail gives users 5 GB of storage for free. This is a big selling point for users who need to store a lot of emails.

Gmail also offers better security features than Hotmail. With Gmail, users can enable two-step verification, which adds an extra layer of security to their account. This is a great feature for those who are concerned about their account being hacked.

Finally, Gmail has better search features than Hotmail.

Hotmail vs Gmail: Which One Is Better?

When it comes to choosing an email service, there are many options available. However, two of the most popular services are Hotmail and Gmail. So, which one is better?

Hotmail was one of the first web-based email services and it has been around since 1996. It is a free service that is owned by Microsoft. One of the benefits of using Hotmail is that it can be integrated with other Microsoft products, such as Office 365 and Skype.

Another advantage is that Hotmail offers a variety of features, such as the ability to create multiple email addresses and use filters to organize your inbox. However, one downside of Hotmail is that it tends to load slowly and can be difficult to use on mobile devices.

Gmail is a email service that was launched by Google in 2004.

Categories
Apps

Best App to Track Target Phones in 2022

App to track target phones? A new app called “Phone Tracker” promises to let users track any phone, even if it’s not their own. The app, which is available for both Android and iPhone, uses GPS to track the location of a phone. It can also be used to spy on text messages, emails, and even phone calls.

The app has been controversial, with some people arguing that it’s a violation of privacy. However, the developers of the app say that it’s meant to be used for things like finding lost phones or keeping track of children.

Whether you think the app is a good idea or not, there’s no denying that it has some impressive features. So if you’re curious about what it can do, read on for more information.

Best Free SMS tracker without installing on the target phone

There are a few things to keep in mind when choosing the best free text SMS tracker without installing on the target phone.

The first is that it is important to find one that is reliable and has a good reputation. There are several  scams out there, so it is important to be careful.

The second thing to consider is whether or not the tracker will work with the specific type of phone you have. There are many different types of phones out there, so you want to make sure that the tracker you choose will be compatible.

Lastly, you want to make sure that the tracker is easy to use and understand. You don’t want something that is going to be complicated and hard to figure out.

mSpy

mSpy is a phone and computer monitoring software designed to spy on someone’s activities without their knowledge. It can be used to track children, employees, or even a spouse. mSpy can monitor text messages, calls, GPS location, web activity, and more.

mSpy is one of the most popular spying tools available today. It is simple to install and use, and it is very affordable. mSpy has helped many people catch cheating spouses, track down missing children, and even monitor employee productivity.

If you are considering using mSpy to spy on someone, there are a few things you should know. First, mSpy is legal in most countries, but it is illegal to use it in some countries. Second, mSpy requires physical access to the target device in order to install it.

ClevGuard

ClevGuard is an app that can track the target phone’s location. It can also monitor the target phone’s activities, such as calls, texts, and social media usage. ClevGuard can be used to monitor a child’s phone usage or to track a stolen phone.

If you are looking for an app to track target phones, ClevGuard is a great option. This app allows you to track the location of a target phone, as well as see its call history and text messages. You can also use ClevGuard to set up alerts for when the target phone leaves a certain location or makes a certain call.

XNSPY

When it comes to phone tracking apps, XNSPY is one of the most popular and effective options available. The app allows users to track target phones in real time, providing them with a wealth of information about the phone’s location, activities and user.

XNSPY is easy to install and use, and its interface is designed for both novice and experienced users. The app also offers a variety of features that make it more powerful than other phone tracking apps on the market.

If you’re looking for an app to track a target phone, XNSPY should be at the top of your list.

Hoverwatch

Hoverwatch is an app that lets you track target phones. The app is designed to work with Android and iPhone devices.

Hoverwatch can be used to track your target phone’s location, calls, and text messages. The app also lets you view your target phone’s photos and videos.

uMobix

uMobix is a new app that can track the location of any phone. It’s perfect for keeping tabs on your kids or employees.

Here’s how it works: you install the app on your phone and then sign up for an account. Once you’re signed up, you can add any number of phones to your account. uMobix will then track the location of those phones in real-time.

You can see where the phone is on a map, and you can even set up alerts so that you’ll be notified if the phone goes outside of a certain area. uMobix is a great way to keep track of your loved ones or employees.

FlexiSPY

If you’re looking for an app to track target phones, FlexiSPY is a great option. This app allows you to track someone’s phone activity, including text messages, call history, and GPS location.

You can even view the person’s web browsing history and social media activity.

FlexiSPY is a paid app, but it’s worth the price if you need to keep tabs on someone. The app starts at $15 per month, but you can get a discount if you pay for a year upfront.

Overall, FlexiSPY is a great option if you need to track someone’s phone activity. The app is simple to use and provides a lot of useful information.

Categories
How to

How to Scan a QR code on iPhone?

How to scan a QR code on iPhone? It’s easy to scan QR codes on your iPhone, iPad, or another iOS device if you know what you’re doing. You’ve come to the right place – we’ll show you how to scan a QR code on your Apple device.

QR codes aren’t as popular as most people thought they would be, but still quite a few shops, websites and locations use them to communicate or store information. Ticket websites, coupon codes, website links, and contact information are often stored in QR codes.

You can scan QR codes on your iPhone or iPad with ease. This is because Apple built a QR code reader right into its camera, so it’s an easy task if you need to scan something.

As with any tech software, it can sometimes be tricky to figure out what to do or how to get your iOS device to recognize what it’s looking at. We have therefore developed this simple guide on how to scan a QR code with an iPhone.

Since iOS 11, this has been a useful addition, and has been upgraded a few times with each new version of Apple’s OS.

On my iPhone, how do I scan a QR code?

  1. Launch the camera app on your iPhone or iPad
  2. And hold it up so that you can see the QR code clearly
  3. It will recognize the code and send you a notification
  4. You can tap to go to the destination

How to scan a QR code on an iPhone and iPad

First, launch the camera app on your iPhone or iPad. You can usually find it on the home page, in the bottom right corner. On iPads, it’s on the first page, and if you’ve moved it around, it will appear somewhere else.

Hold the device’s camera up to the QR code. You don’t need to tap the shutter button, your iOS device will automatically recognize the QR code and provide you with an on-screen notification. (Make sure you have a mobile signal or you’re connected to Wi-Fi, otherwise, this won’t work.)

Tap the notification to be taken to the QR code’s destination. This may be a website, app, or feature on your phone. Now you can change the default browser on your iPhone or iPad. This is thanks to the relaxation in recent iOS versions. In this case, you’ll see a notification when scanning to go to Chrome or Safari.

In just a few steps, you’ve scanned a QR code on your iPhone or iPad.

The secret code scanner in your iPhone

Your iPhone has a secret code scanner – did you know that? It’s not an app per se (well, it is, but you can’t see it in your app library), but you can find it using Spotlight.

It does the same thing as in the camera app but gives you a larger viewfinder to play with.

Swipe down from the home screen to access the search bar at the top of your iPhone and then type in ‘Code Scanner’ – or you can go to ‘Settings’, then to ‘Control Center’ and select ‘Code Scanner’.

Simply swipe down from the top right-hand corner of your screen to get there, and you can get all scan-like whenever you want.

The Wallet app can scan QR codes on iPhones and iPads

The Wallet app on iPhone and iPod also includes a QR reader. Open the app, click on the plus button at the top of the “Passes” section, then tap on Scan Code to Add a Pass.

You can scan QR codes from here for coupons, boarding passes, tickets, and loyalty cards, but only for the things that Wallet considers “passes.” If you try to scan any other QR code, you will receive an error message.

You can also go to the App Store if neither of the above two methods appeal to you. In the App Store, you’ll find a wide selection of free QR code reading applications.

Categories
How to

How to Loop a Youtube Video? Here’s How

How to loop a youtube video? There are many people who like to play their favorite songs, ASMR videos, meditation guides, and other types of videos on repeat. Since there are over two billion monthly users on YouTube, it makes sense that many of them use the platform as their primary channel for relaxation, motivation, and entertainment. It’s handy to be able to set up a video to play on repeat while you unwind or do other tasks.

To play YouTube videos on repeat, users have used third-party tools for quite some time. YouTube did not introduce the ability to loop a video until 2015 when they replaced Adobe Flash Player with HTML5. Now you can set your favorite videos to replay for as long as you like in just a few clicks. YouTube’s mobile version is lagging behind with this feature. If you’re a mobile user, you’ll still have to use workarounds.

In this article, we’ll look at how both desktop and mobile users can loop YouTube videos.

How to Loop YouTube Videos on Desktop?

Desktop users can now watch their favorite YouTube videos on repeat thanks to Google. You can set up the loop in a few easy steps if you’re using a browser such as Firefox or Chrome. You can do so by using:

  • Right-click
  • Right-click + Shift key

How to Loop a YouTube Video with Right-Click?

After YouTube’s migration to HTML5, users can now loop any video with just a few mouse clicks. What you need to do is:

  • Search for a video you want to loop
  • Open the video
  • Right-click anywhere within the video borders
  • Click on Loop in the menu

The video will keep playing on repeat until you right-click it again and uncheck Loop to turn it off.

How to Loop a YouTube Video with Right-Click + Shift Key?

If you cannot find the loop option when you right-click on the video, you can open an alternate menu using both the mouse and shift keys. You need to:

  • Open the video you want to loop
  • by holding the shift key and right-clicking
  • Select Loop from the alternate menu

Hold the shift key and right-click again if the alternative menu doesn’t appear on the first click. Previously, this option was only available in Chrome, but now it is available in other browsers as well, including Firefox.

How to Loop a YouTube Video on Mobile?

Currently, mobile devices lack the simple option for looping a YouTube video that was introduced to desktop browsers. Another option must be used instead. These are:

  • Creating a playlist
  • Using YouTube video looping websites

Looping YouTube Videos by Creating a Playlist

With a YouTube account, you can create a playlist manually from a single video without editing links. When you want to watch it again, you can open the playlist.

Here’s how it’s done:

  • Open the video in the YouTube mobile app
  • Tap on the video
  • Click on the Save button below the video
  • Choose the option New Playlist
  • Give your newly-created playlist a title
  • Choose whether it will be public, private, or unlisted
  • Then, head to your Library
  • Open the playlist you created
  • Tap the Repeat button

Using YouTube Video Looping Websites

YouTube videos can be looped on a number of websites. Using some of these sites allows you to choose a specific part of the video to loop. However, many of them are full of ads and may contain malware. Consider using Infinite Looper for the job.

As we discussed earlier, you can set up YouTube videos to play in a loop. Let’s look at how you can create a great video loop using one of the best video editing apps available.